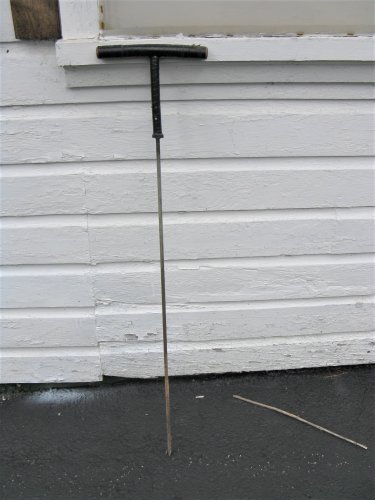
In 1962 I made my first bottle probing rod and having nothing but problems I continued to develop this rod for the next 5 or so years. I finally designed the perfect rod for finding bottles and privies and it has rewarded me with many fantastic bottles, not only single but with it sounding the ground for pre-dug pits. If you decide to make one according to my drawing it is important to following the drawing as close as possible:
1. The steel rod should be 7/16" in diameter and be of SPRING steel. This rod can be found in old car trunk where two of two of these rods hold the trunk lid open.
2. The total length needed will be the distance from your upper waist, to ground level.
3. The handle and stiffening rods comes from a scrapped bicycle frame with the stiffening rod being the smallest diameter that the rod will pass through into the handle made from the 1" diameter tubing. File off all sharp edges.
4. assemble as in the drawing and gas braze or weld where shown all around the washer and tubing. Make sure the
top of the rod is against the upper part of the handle.
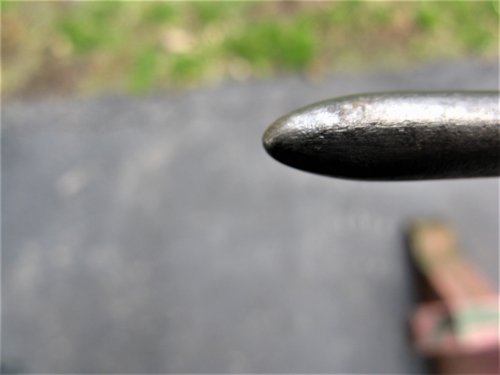
Once this rod is completed and the tip PROPERLY ground as the picture shows, start practicing where you know a bottle or pieces of glass exist. Don't quit! keep practicing and before long you will be able to tell the difference between a rock, a tin can, odd material and glass. Always PUSH the probe, wiggle lightly when you think you're on glass or else you'll mark the glass from the tip of the rod. I have found early light bulbs over a foot deep without breaking them..this you'll be able to do after awhile, JUST DON'T QUIT, practice enough and that rod will be like your eyes seeing under the ground. I taught my wife to use a rod I made for her and her very first bottle was a pontiled cobalt blue umbrella ink. If you hit a privy or dug hole made years ago for trash that rod will offer very little resistance. If you have questions please email me privately and I may be able to help your further.
1. The steel rod should be 7/16" in diameter and be of SPRING steel. This rod can be found in old car trunk where two of two of these rods hold the trunk lid open.
2. The total length needed will be the distance from your upper waist, to ground level.
3. The handle and stiffening rods comes from a scrapped bicycle frame with the stiffening rod being the smallest diameter that the rod will pass through into the handle made from the 1" diameter tubing. File off all sharp edges.
4. assemble as in the drawing and gas braze or weld where shown all around the washer and tubing. Make sure the
top of the rod is against the upper part of the handle.
Once this rod is completed and the tip PROPERLY ground as the picture shows, start practicing where you know a bottle or pieces of glass exist. Don't quit! keep practicing and before long you will be able to tell the difference between a rock, a tin can, odd material and glass. Always PUSH the probe, wiggle lightly when you think you're on glass or else you'll mark the glass from the tip of the rod. I have found early light bulbs over a foot deep without breaking them..this you'll be able to do after awhile, JUST DON'T QUIT, practice enough and that rod will be like your eyes seeing under the ground. I taught my wife to use a rod I made for her and her very first bottle was a pontiled cobalt blue umbrella ink. If you hit a privy or dug hole made years ago for trash that rod will offer very little resistance. If you have questions please email me privately and I may be able to help your further.